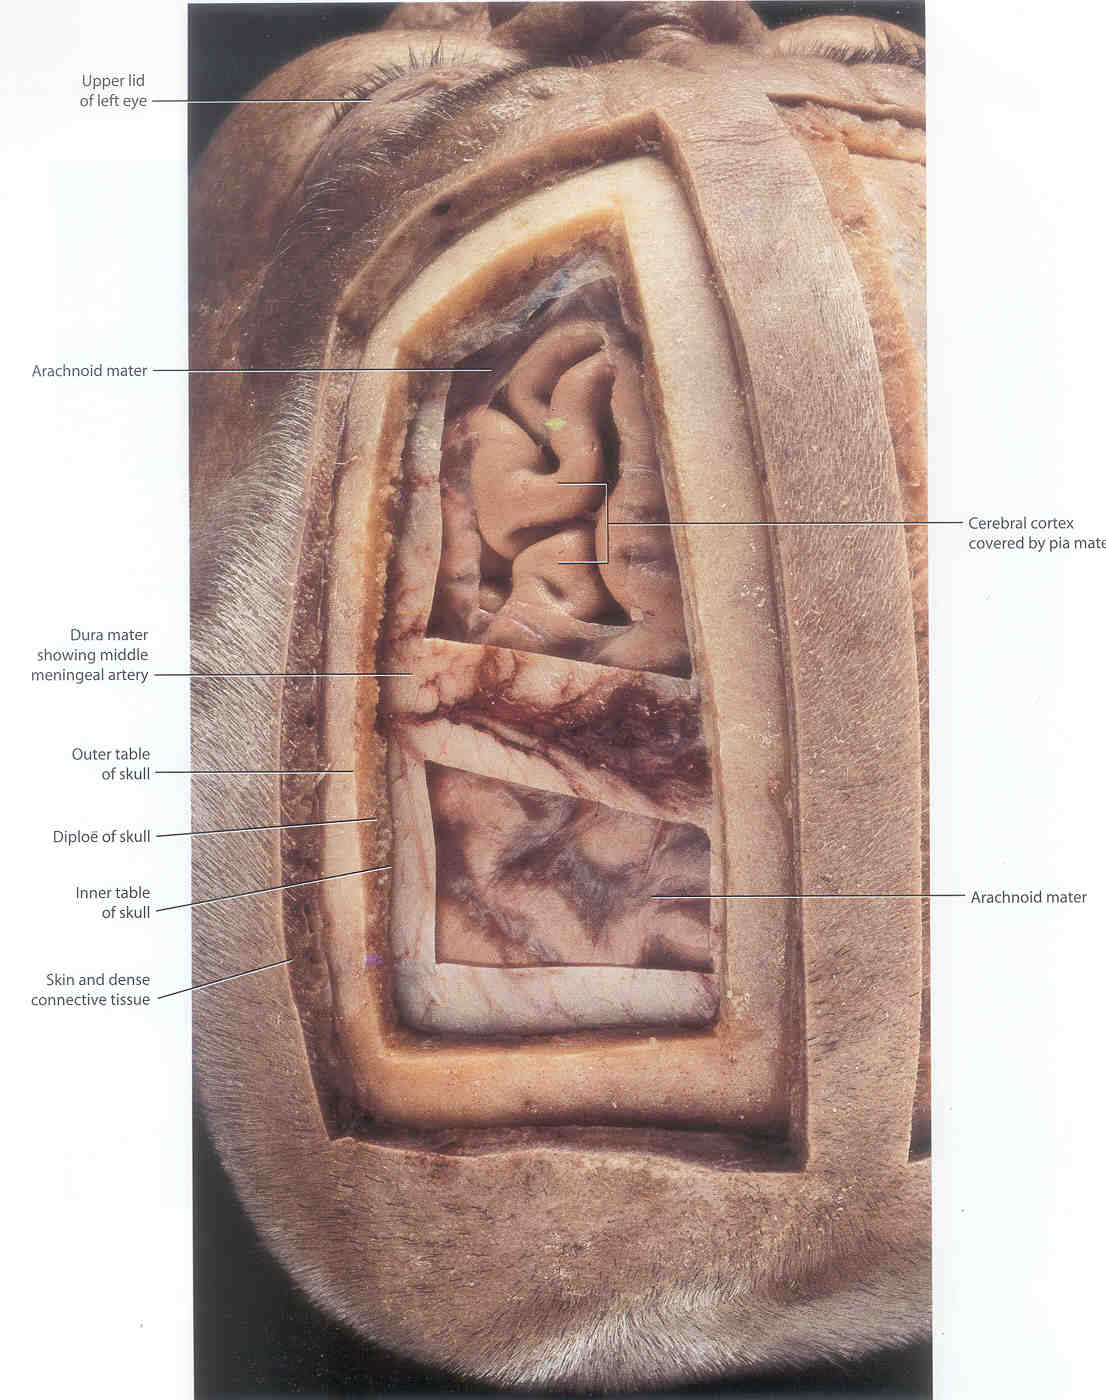
Neuroanatomy Images:
Image #1: Note the different layers, from outside in, especially the three layers of the meninges.
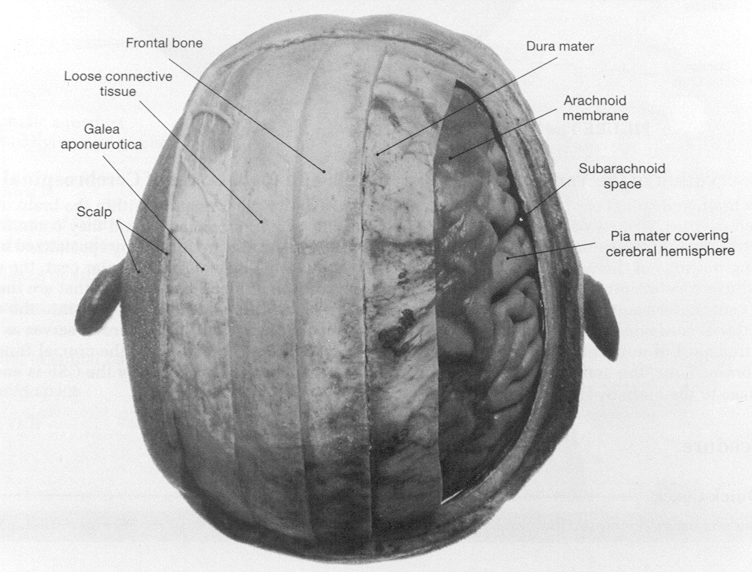
Image #2: Identify the sulci #1 and #7; identify the gyri #2 and #10; and the different colored lobes.
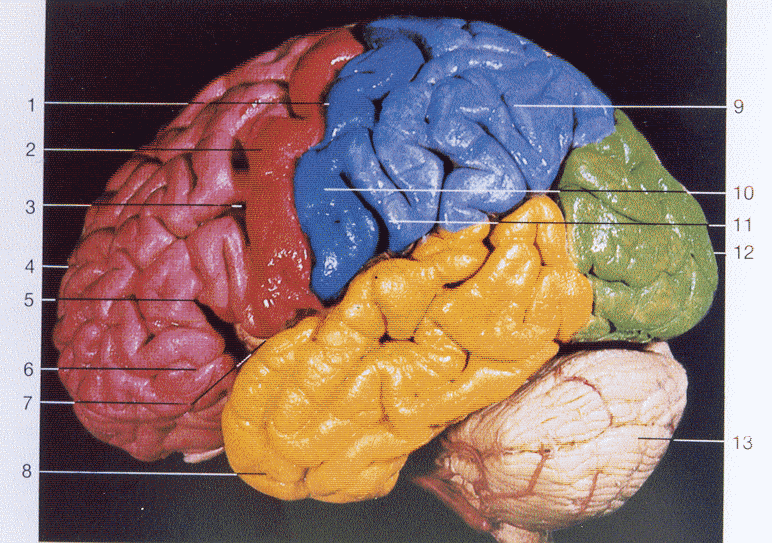
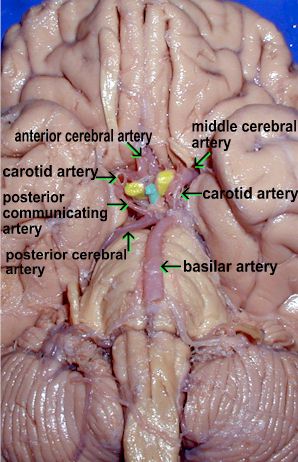
Image #3: Identify: olfactory bulbs; optic chiasm; infundibulum; mammillary bodies;
vertebral arteries; basilar artery; pyramids of the medulla; folds on the surface of the cerebellum.
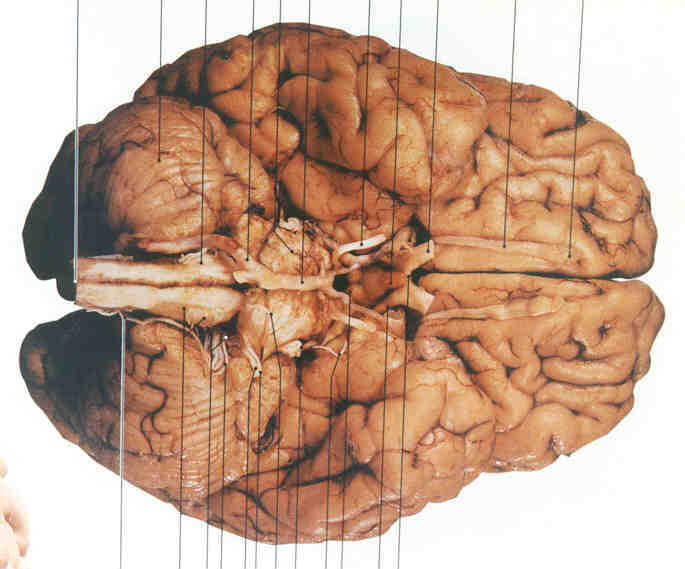
Image #4: Identify: olfactory bulbs; optic chiasm; mammillary bodies; longitudinal fissure;
oculomotor cranial nerve; abducens cranial nerve; trigeminal cranial nerve; pyramids of medulla
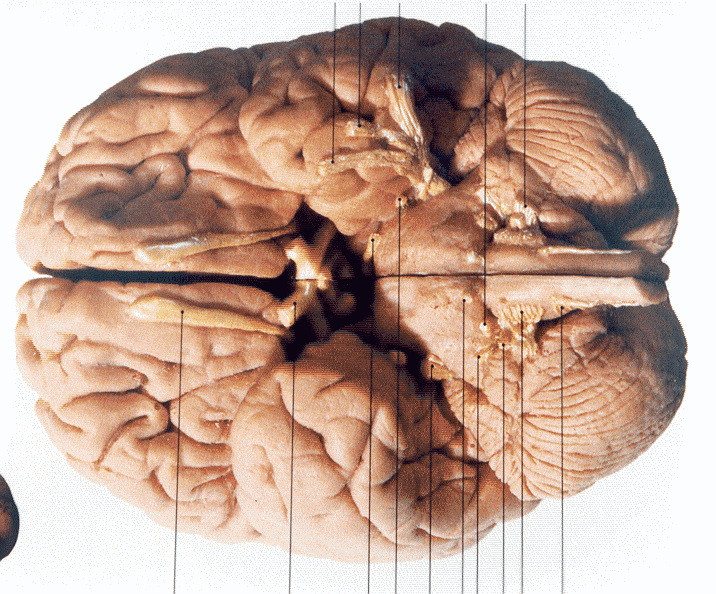
Image #5: Identify: olfactory nerves; optic nerves; optic chaism; mammillary bodies;
oculomotor cranial nerve; trigeminal cranial nerve; abducens cranial nerve; pyramids of medulla; folia.
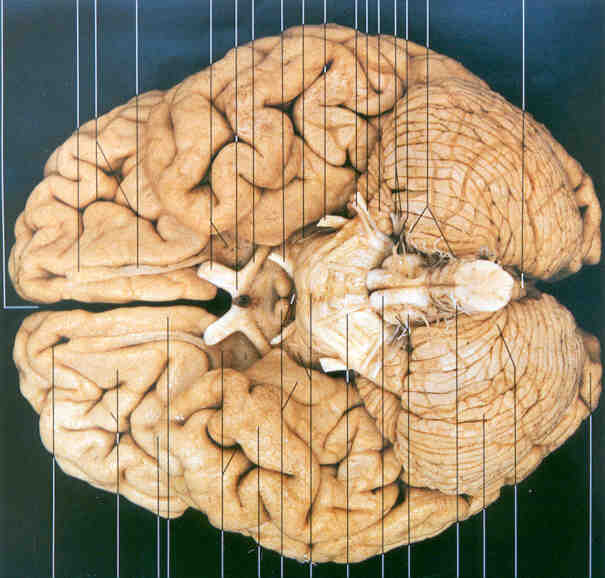
Image #6: Identify: mammillary bodies (orange); longitudinal fissure; olfactory nerve; optic nerve; optic chiasma.
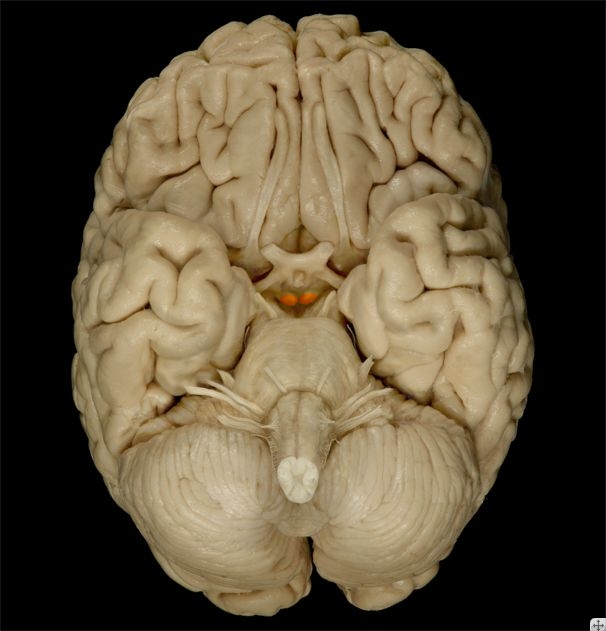
Image #7: Identify: corpus callosum; frontal sinus; septum pellucidum; thalamus;
optic chiasm; infundibulum; pituitary gland; mammillary body; pons; medulla; 4th ventricle;
cerebral aqueduct; superior colliculus; inferior colliculus; corpora quadrigemina; folia.
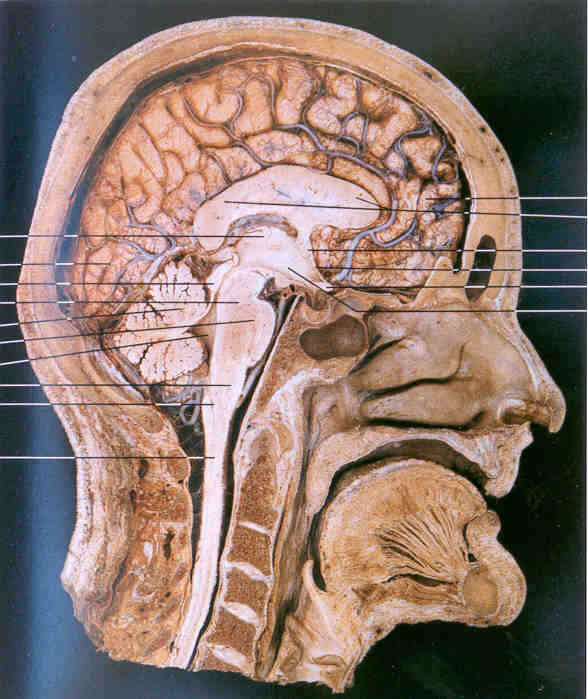
Image #8: Identify: falx cerebri; corpus callosum; septum pellucidum; thalamus;
3rd ventricle; cerebral aqueduct; 4th ventricle; superior colluculus; inferior colliculus; pons;
corpora quadrigemina; medulla; spinal cord; optic chiasm; infundibulum; pituitary gland; sella turcica.
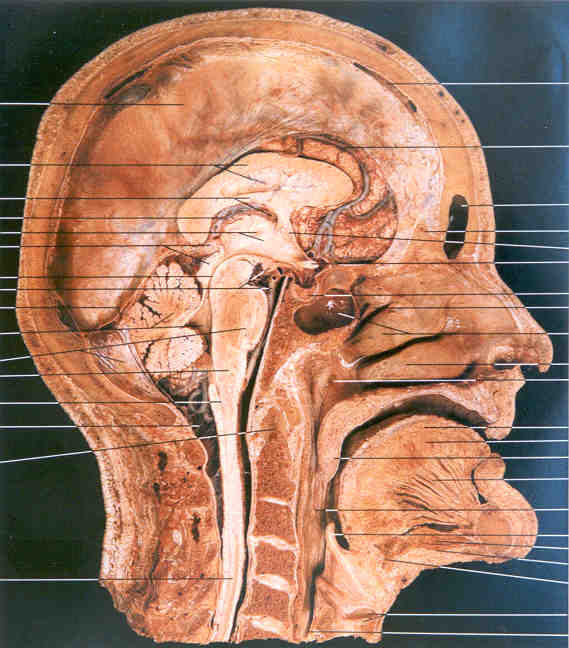
Image #9: Identify: frontal lobe; parietal lobe; occipital lobe; temporal lobe;
corpus callosum; septum pellucidum; thalamus; 3rd ventricle; cerebral aqueduct; 4th ventricle; pons;
medulla; spinal cord; cerebellum; folia; superior colliculi; inferior colliculi; corpora quadrigemina;
optic nerve; mammillary body; transverse fissure.
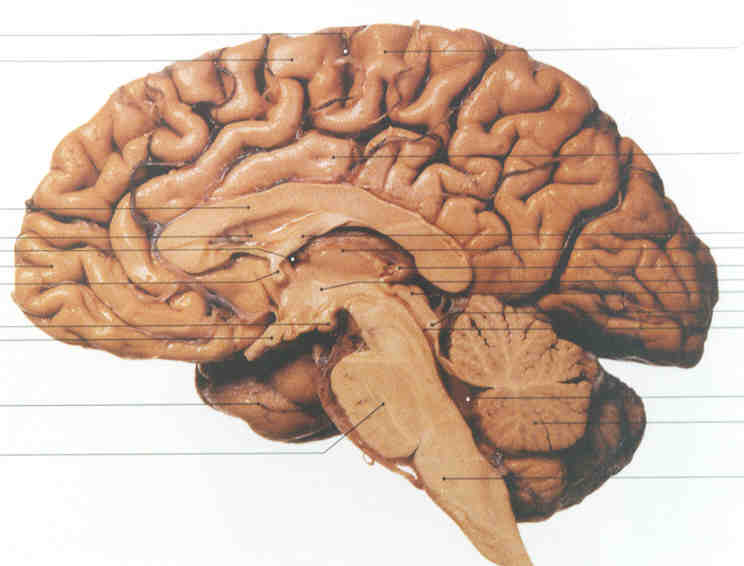
Image #10: Identify: corpus callosum; septum pellucidum; fornix; optic chiasm; mammillary body;
superior colliculus; inferior colliculus; corpora quadrigemina; 3rd ventricle; 4th ventricle; cerebral aqueduct;
pons; cerebellum; transverse fissure.
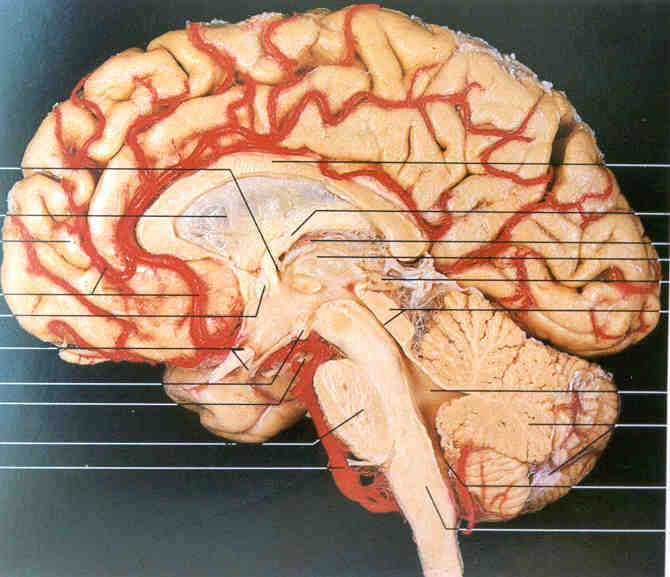
Image #11: Identify: corpus callosum; septum pellucidum; 3rd ventricle; cerebral aqueduct;
4th ventricle; intermediate mass; superior colliculus; inferior colliculus; pons; medulla;
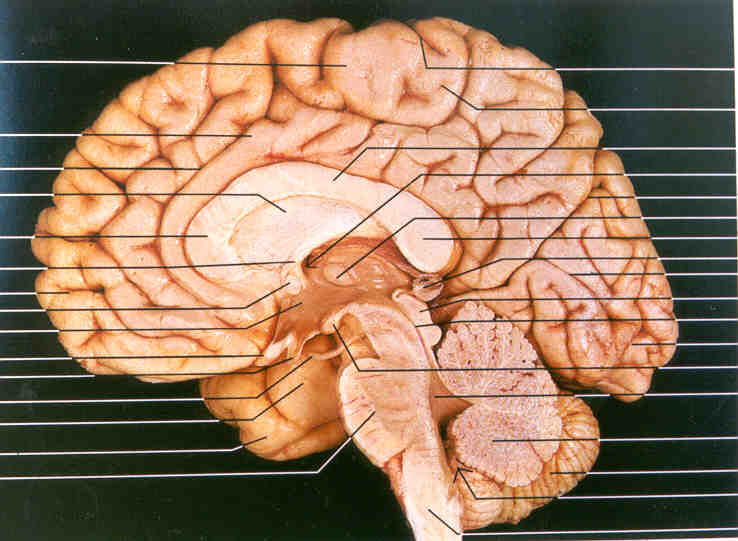
Image #12: Identify: corpus callosum; septum pellucidum; hypothalamus; optic chiasm;
infundibulum (torn); tuber cinereum; mammillary body; thalamus; 3rd ventricle; 4th ventricle; cerebral aqueduct;
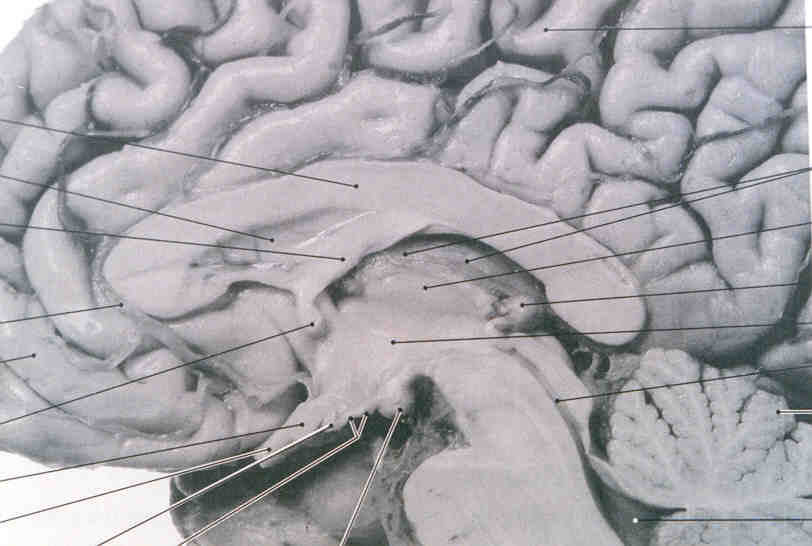
Image #13: What are the 'arbor vitae' and the 'cerebellar peduncles'?
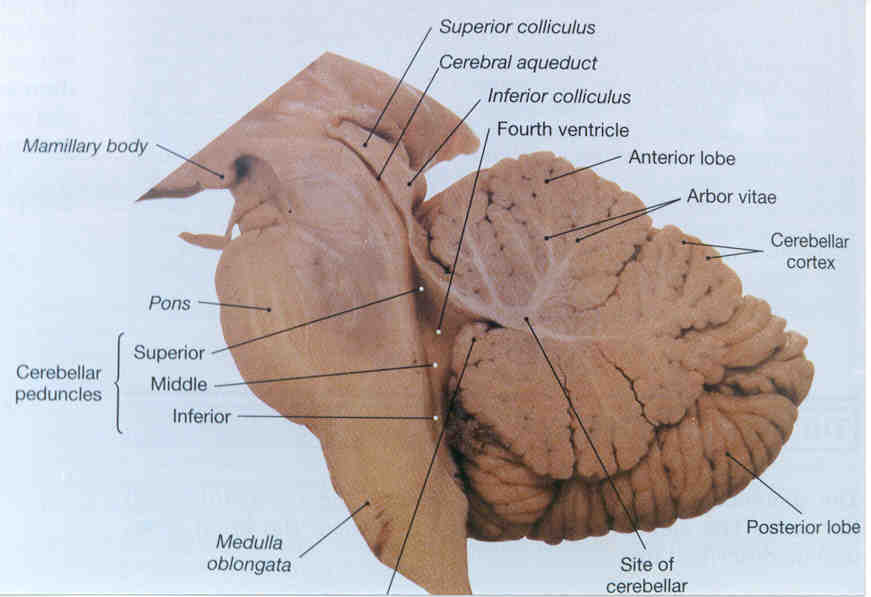
Image #14: How can the 'caudate nucleus' and the 'putamen' be next to each other
when they are separate in Image #14?
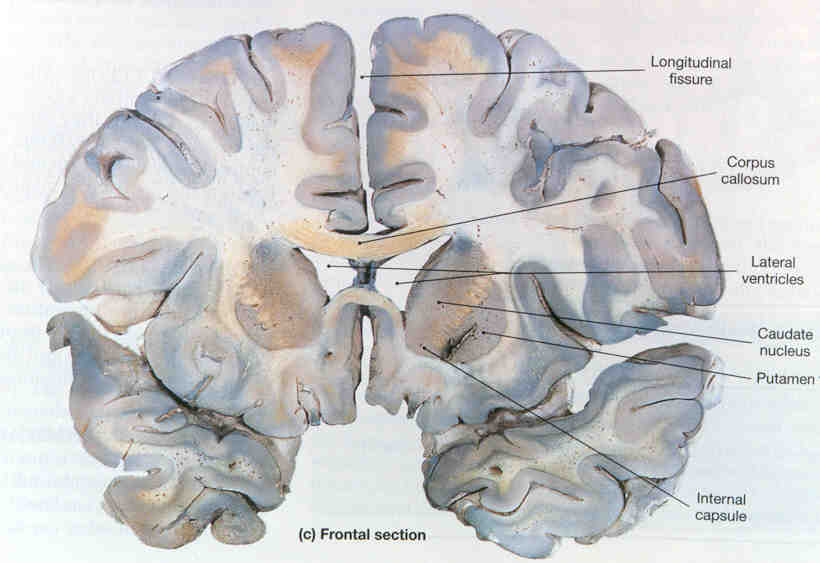
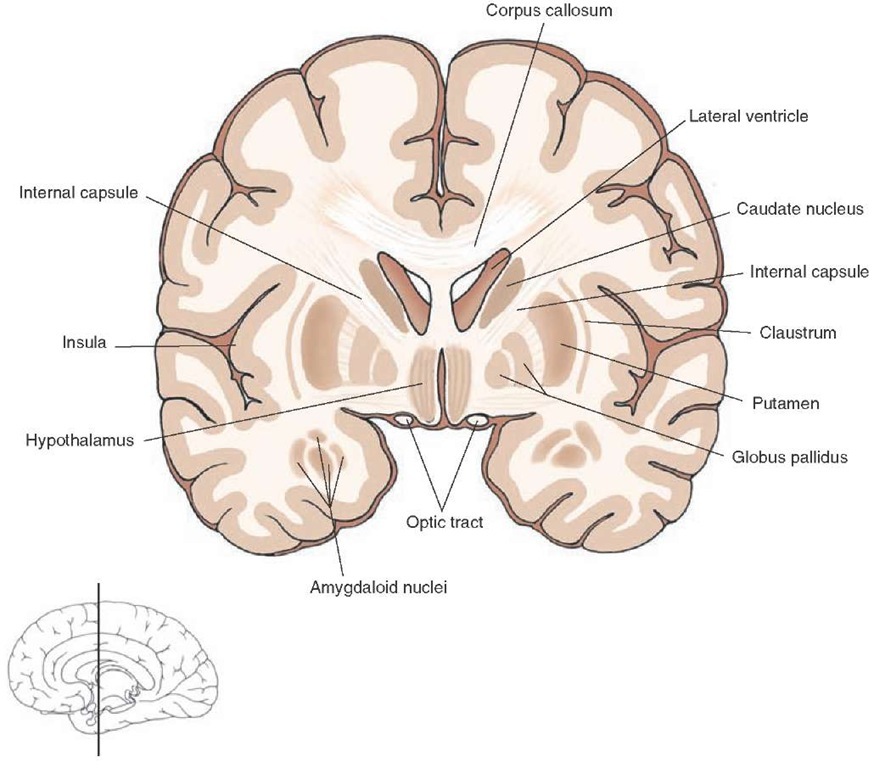
Image #15: Identify: longitudinal fissure; corpus callosum; septum pellucidum;
lateral ventricles; caudate nucleus; thalamus; putamen; globus pallidus; fornix; 3rd ventricle;
hypothalamus; insula; choroid plexus; internal capsule; claustrum; lateral fissure.
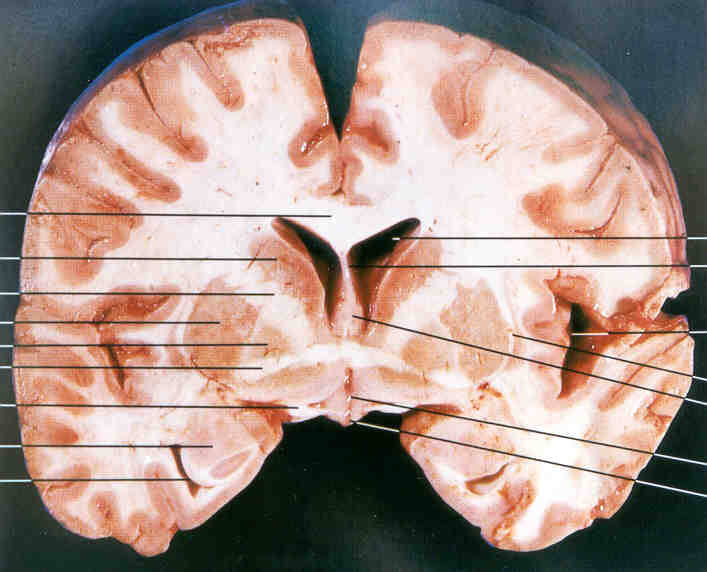
Image #16: Identify: longitudinal fissure; corpus callosum; septum pellucidum;
lateral ventricles; caudate nucleus; thalamus; putamen; globus pallidus; fornix; 3rd ventricle;
mammillary bodies; insula; internal capsule; claustrum; lateral fissure.
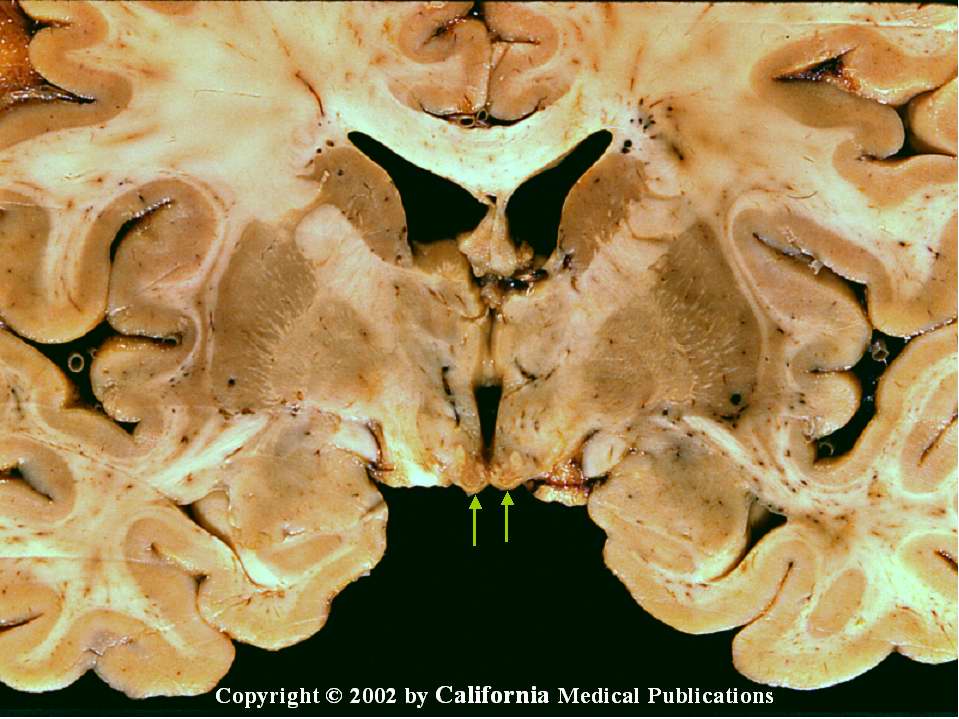
Image #17: Identify: superior colliculi; inferior colliculi; 4th ventricle;
tentorium cerebelli; falx cerebri.
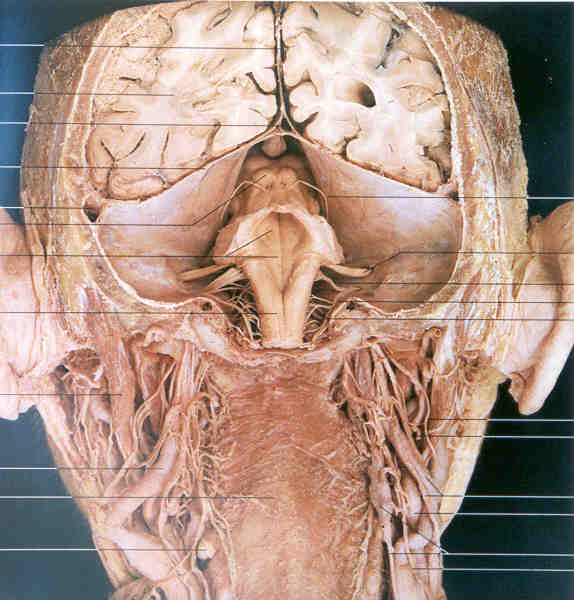
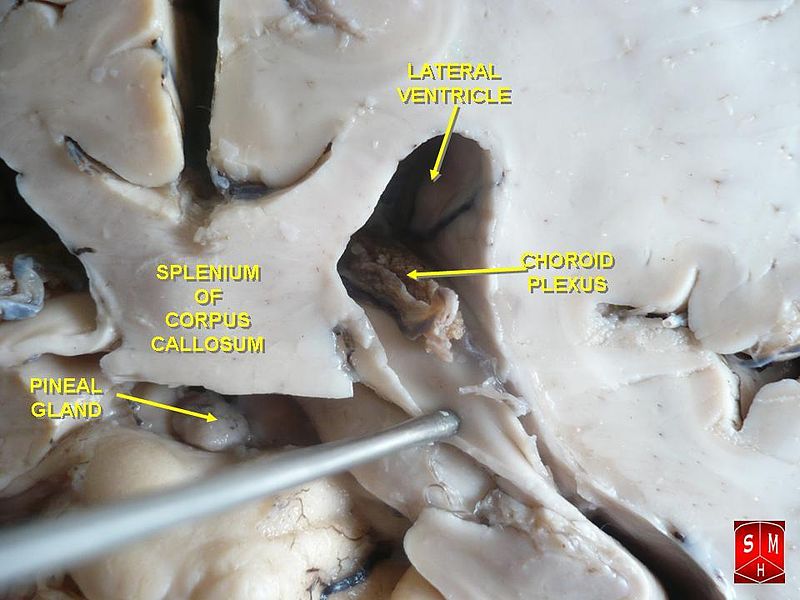
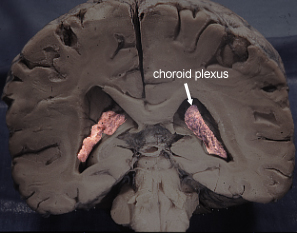
Image #18: Identify: corpus callosum; septum pellucidum; lateral ventricles;
choroid plexus; falx cerebri; caudate nucleus; putamen; globus pallidus; insula; longitudinal fissure.
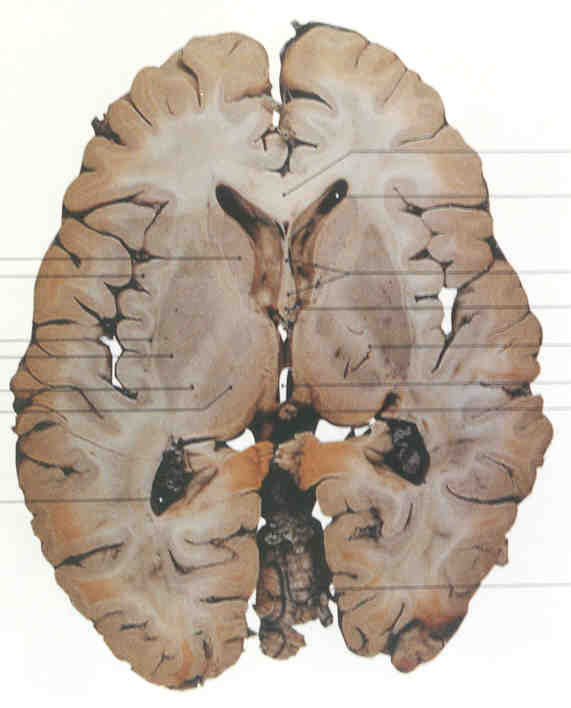
Image #19: Identify: corpus callosum; septum pellucidum; lateral ventricles;
choroid plexus; falx cerebri; caudate nucleus; putamen; globus pallidus; insula; longitudinal fissure.
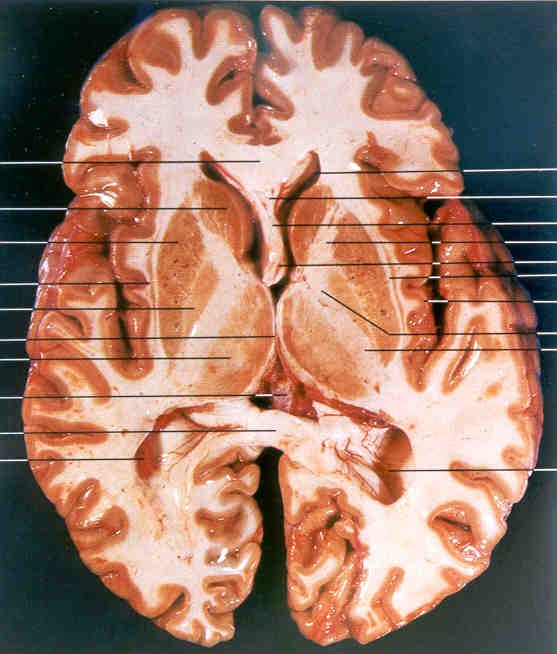
Image #20: Identify: caudate nucleus
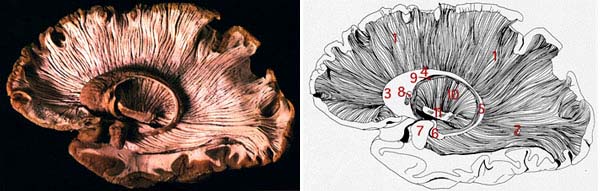
Image #21: Identify: cingulate gyrus

Image #22: Identify: hippocampus
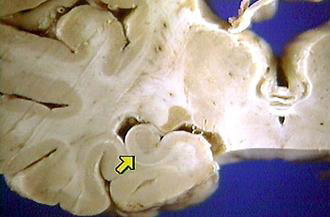
Image #23: Identify: hippocampus
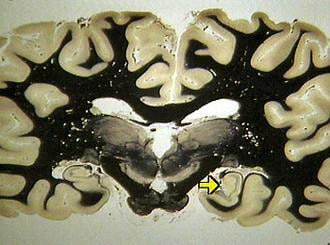
Image #24: Identify: insula
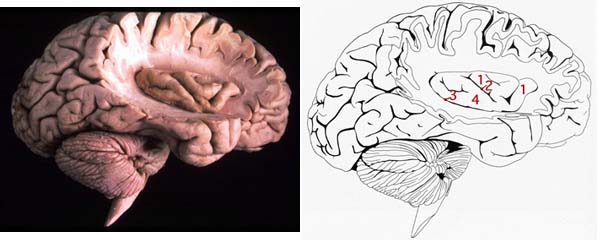
Image #25 & #26:Midsagittal Sections of Midbrain and Thalamus.
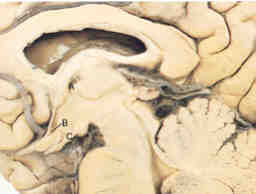
Image #27: Horizontal Section.
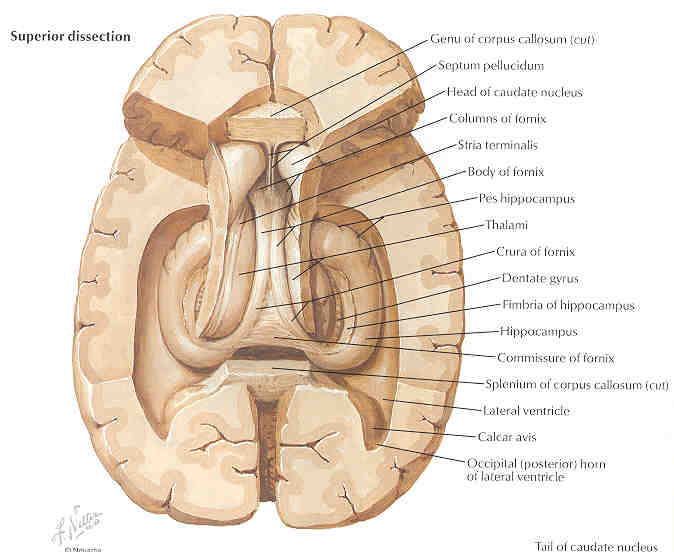
Image 28: Note the parahippocampal gyrus and uncus.

Image 29: Note the Parahippocampal Gyrus and Cingulate Gyrus.
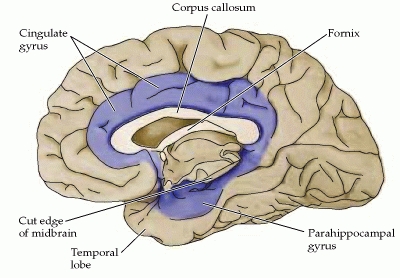
Image 30: Note the parahippocampal gyrus and parieto-occipital sulcus.
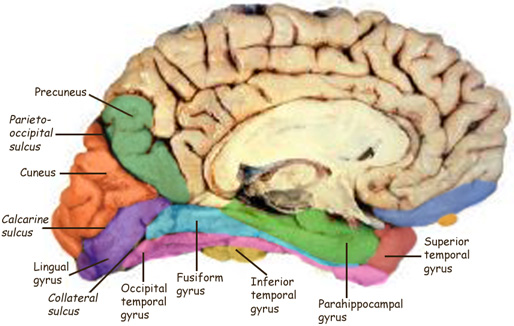
Image 31: What structure is marked with the 'star'?
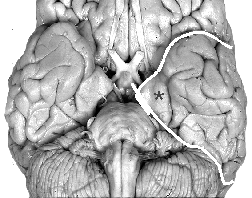
Image 32: What is highlighted in red?
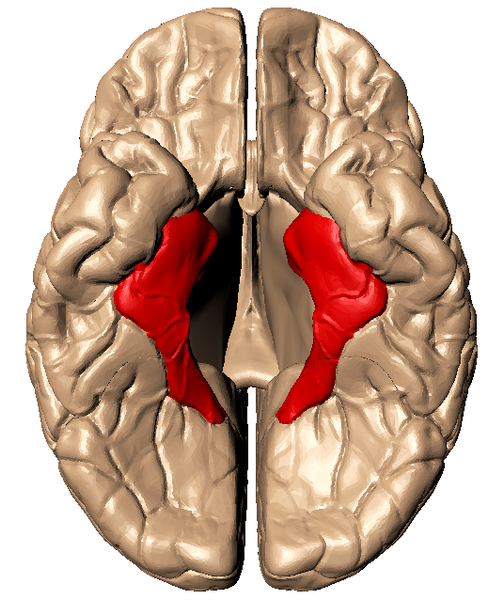
Image 33: Coronal Section: Note hippocampus.
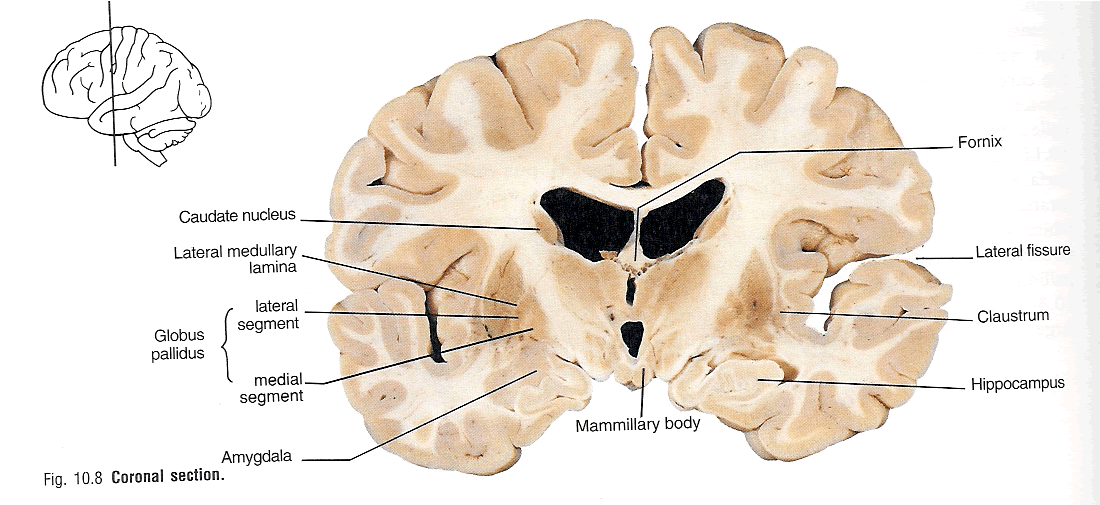
Image 34: hippocampus.
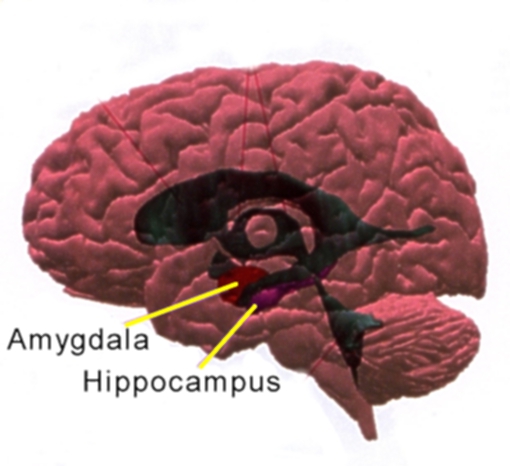
Image 35: midsagittal section.

Image 36: Note hippocampus in bottom coronal section.
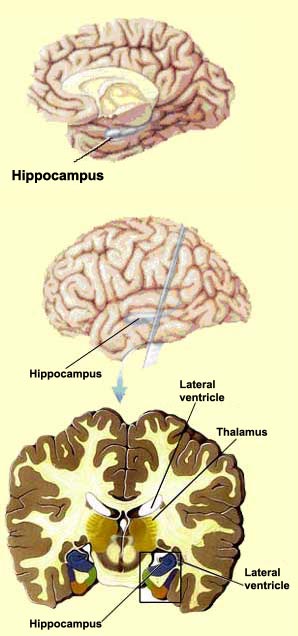
Image 37: Hippocampus.

Image #38: Fornix
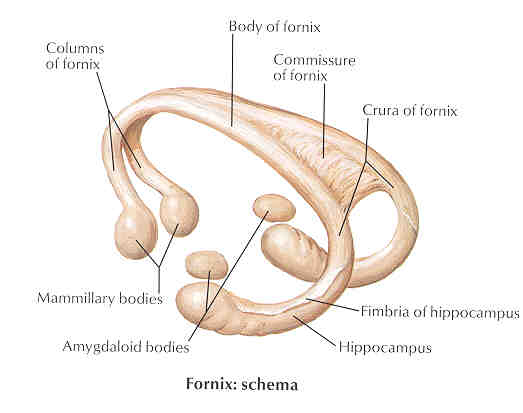
Image #41: Identify the substantial nigra and red nucleus.
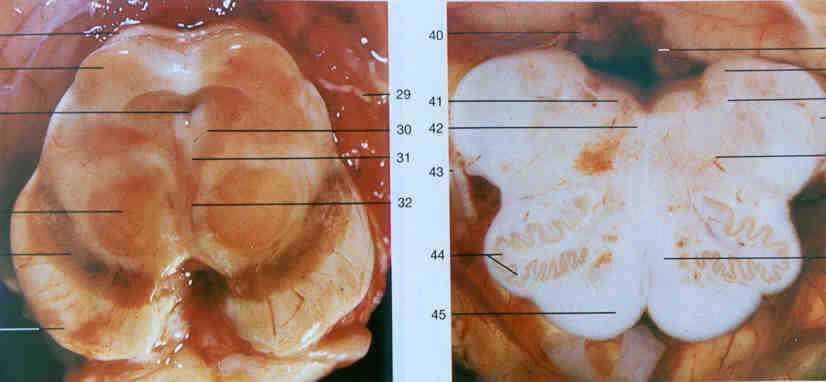
Image #42: The substantial nigra.
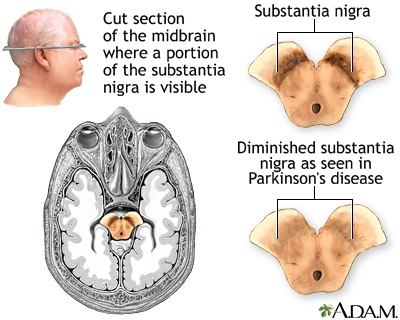
Image #43: Identify the substantial nigra.
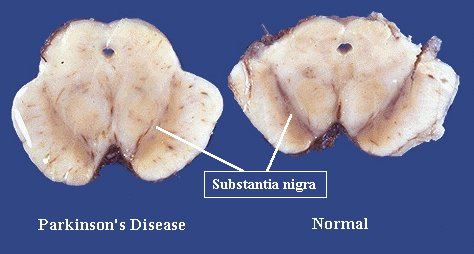
Image #44: Identify the substantial nigra and red nucleus.
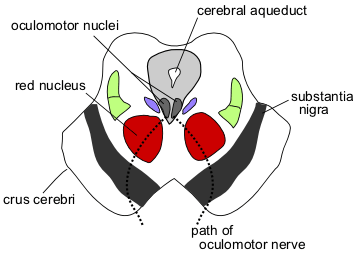
Image #45: The Spinal Cord with Meninges.
Image #46: Cauda Equina.
Image #47: Spinal Cord.
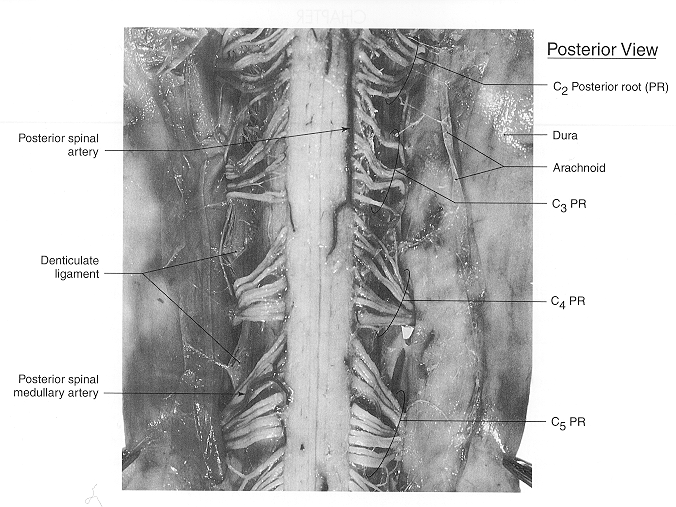
Image #48: Spinal Cord.
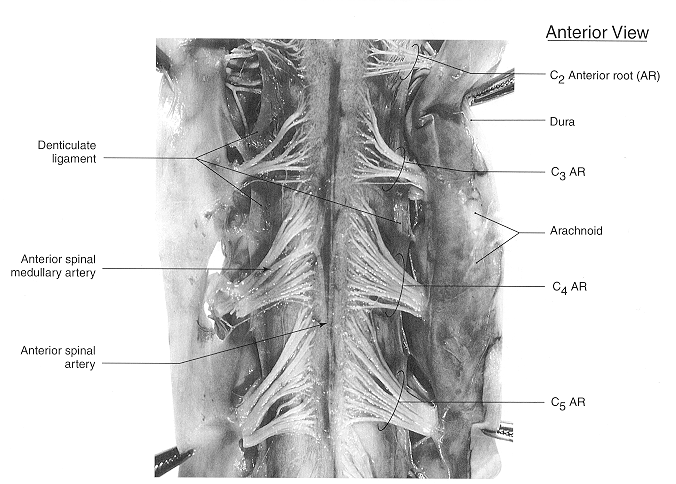
Image #49: Spinal Cord.

Image #50: Spinal Cord.
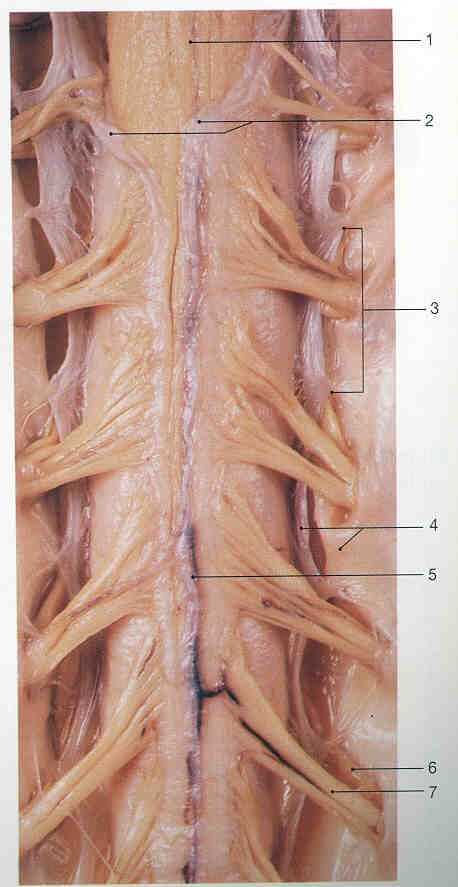
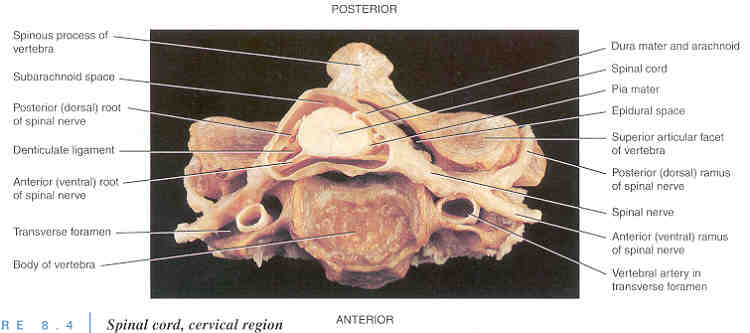
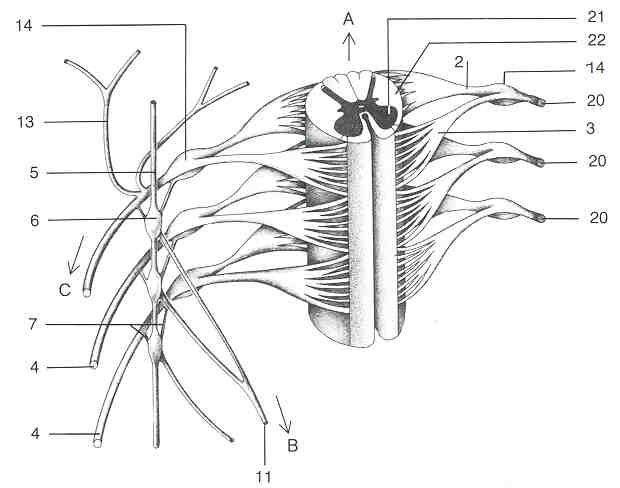
1:Anterior Median Fissure; 2:Pia Mater; 3:Denticulate Ligaments;
4:Arachnoid and Dura Mater (reflected); 5:Spinal Blood Vessel;
6:Dorsal Root of 6th Cervical Nerve; 7:Ventral Root of 6th Cervical Nerve.
Image #51: Hypothalamus.
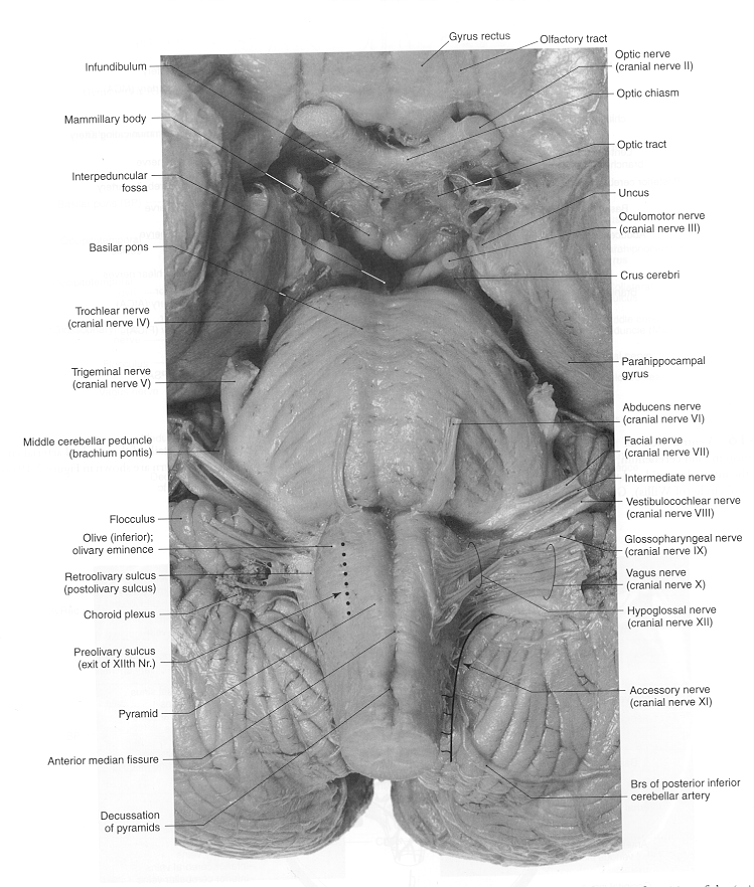
Image #52:Circle of Willis.
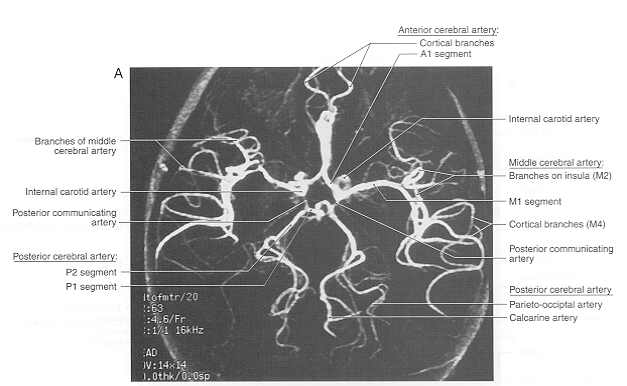
Image #53:Spinal Cord: Sacral Level.
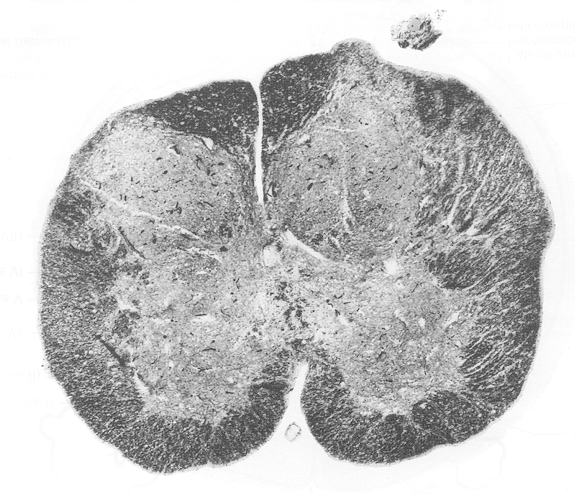
Image #54:Spinal Cord: Lumber Level.
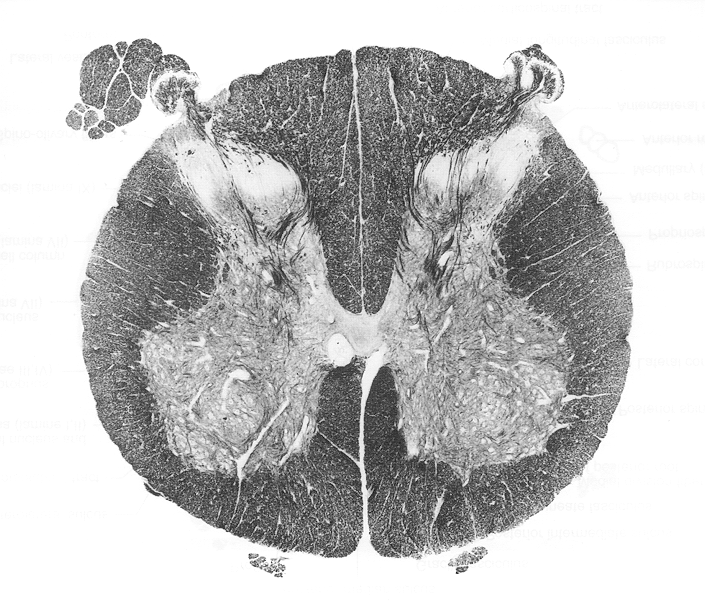
Image #55:Spinal Cord:
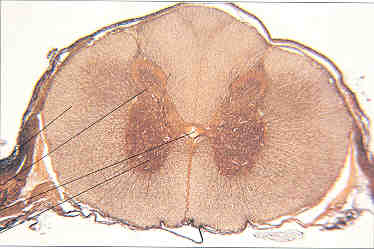
Image #56:Spinal Cord: Thoracic Level.

Image #57:Spinal Cord: Cervical Level.

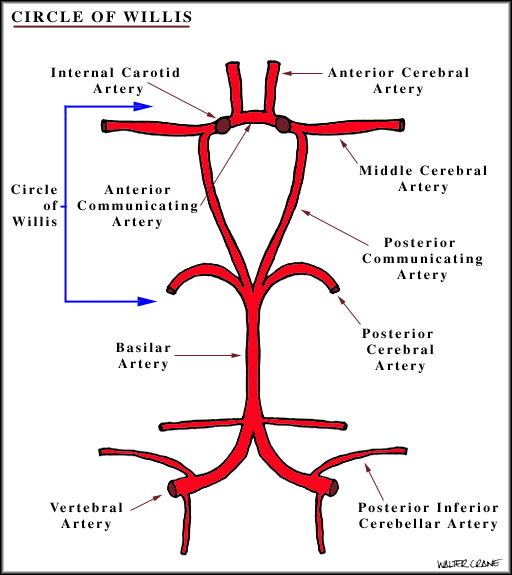
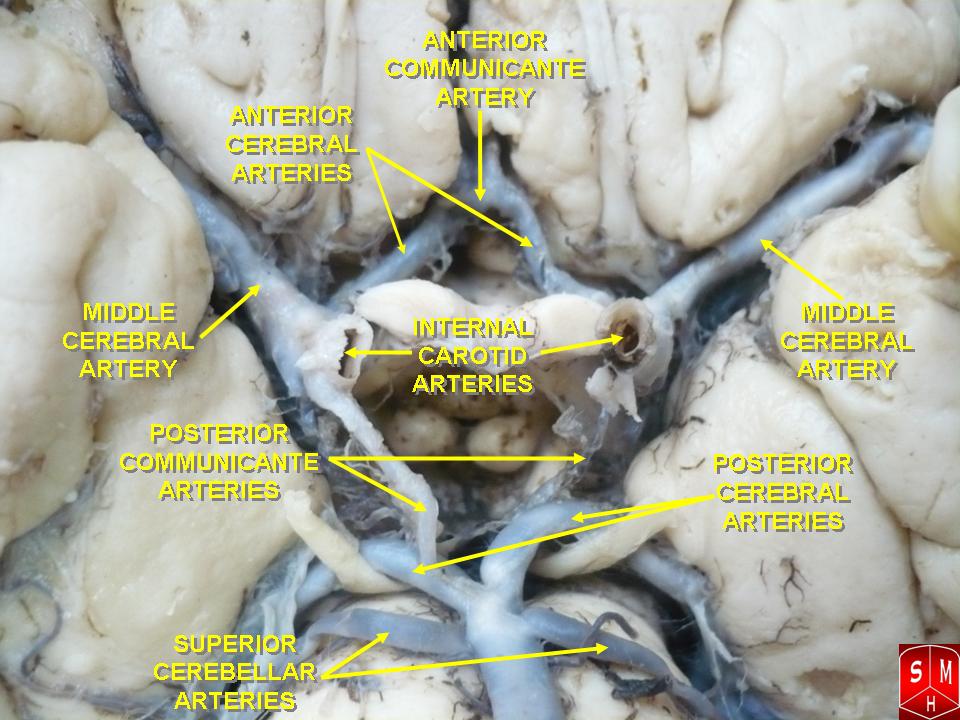
Click here for Circle of Willis
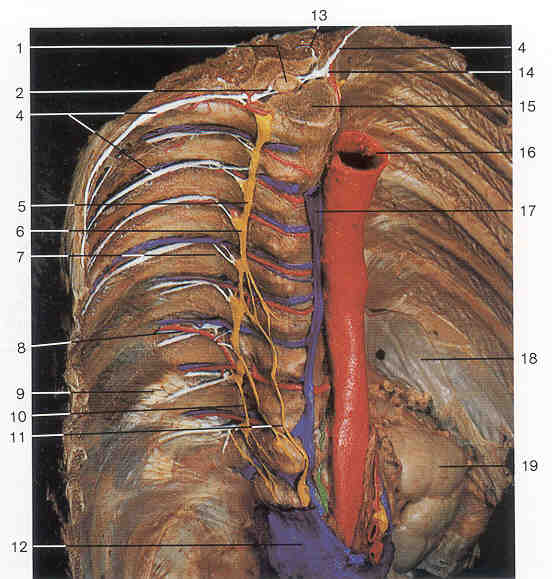
1:spinal cord; 2:dorsal root; 3:ventral root; 4:intercostal nerves;
5:sympathetic trunk; 6:ganglia of sympathetic trunk; 7:rami communicantes;
10:lesser splanchnic nerve; 11:greater splanchnic nerve; 12:inferior vena cava;
15:body of vertebra; 16:aorta; 17:azygous vein; 18:diaphragm; 19:kidney.

A:Purkinje cell from the cerebellar cortex; B:Granule cell from the cerebellar cortex;
C:Projection neuron from the inferior olivary nucleus; D:Spinal cord motor neuron;
E:Large pyramidal neuron from the cerebral cortex; F:Olfactory receptor neurons;
G:Dorsal root ganglion cells

A pyramidal neuron from the hippocampus of a rat brain, injected with dye.
Blue Arrow: Cell body;
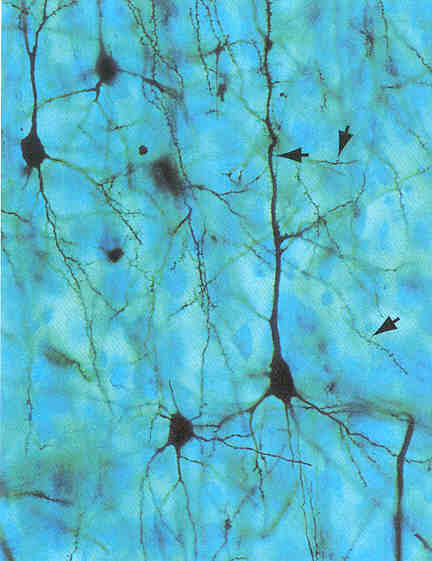
Pyramidal neurons of cerebral cortex individually injected with dye.
Remember that the entire tissue is a solid collection of millions of these neurons.
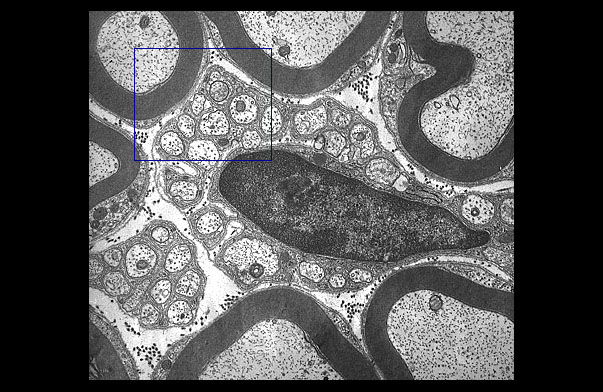
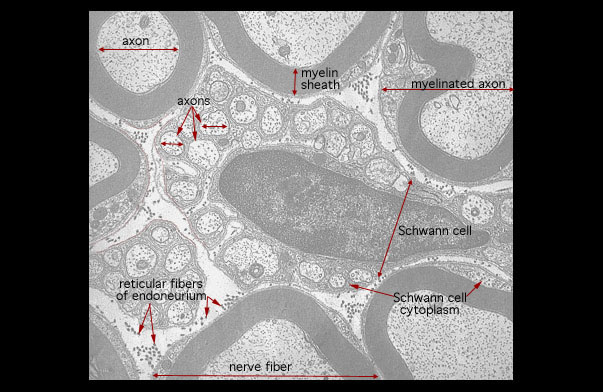
Unmyelinated Neurons - unlabeled
Unmyelinated Neurons - labeled
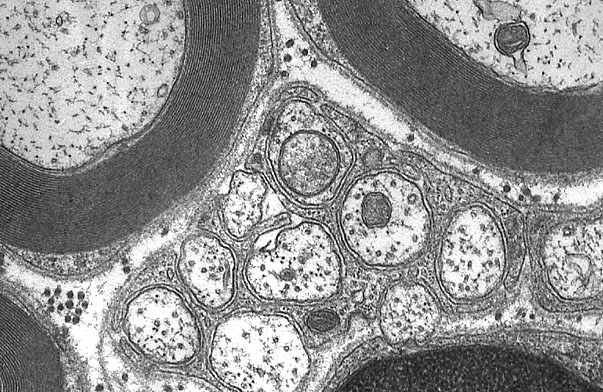
Unmyelinated Neurons - high power - unlabeled
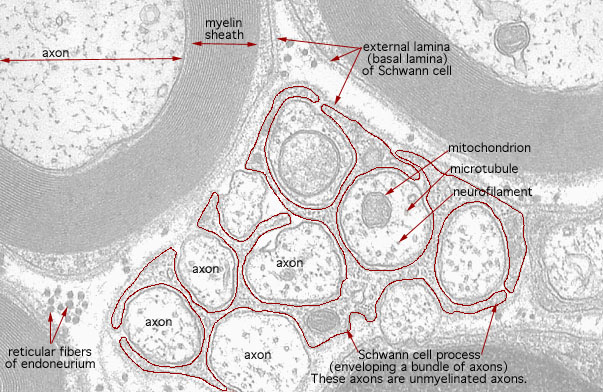
Unmyelinated Neurons - high power - labeled
Click Here for Nervous System PowerPoint Presentation